
SEO Settings Page
The AI Assistant’s SEO Settings page centralizes all the settings and resources you’ll use during the SEO setup process. This includes translations, schema files for adding custom knowledge to AI Assistants, and other essential information required to generate SEO content.
These settings are organized into tabs, making it easier to manage your content preferences, schema files, and other critical SEO configurations.
Each tab is designed to help the AI Assistant effectively create and optimize SEO content based on your selected keywords, page types, and custom knowledge, ensuring your website or blog is well-structured and SEO-ready.
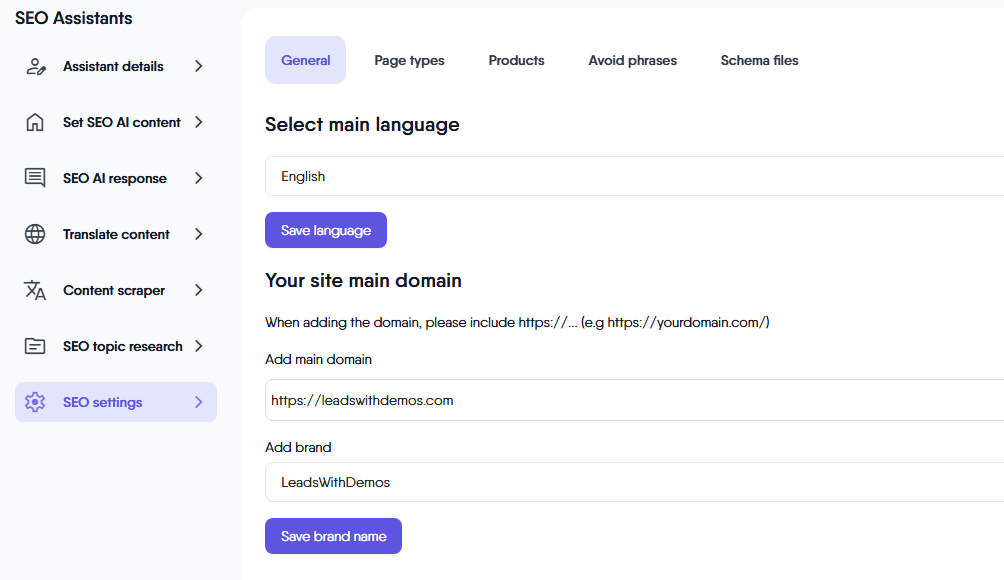
General Tab
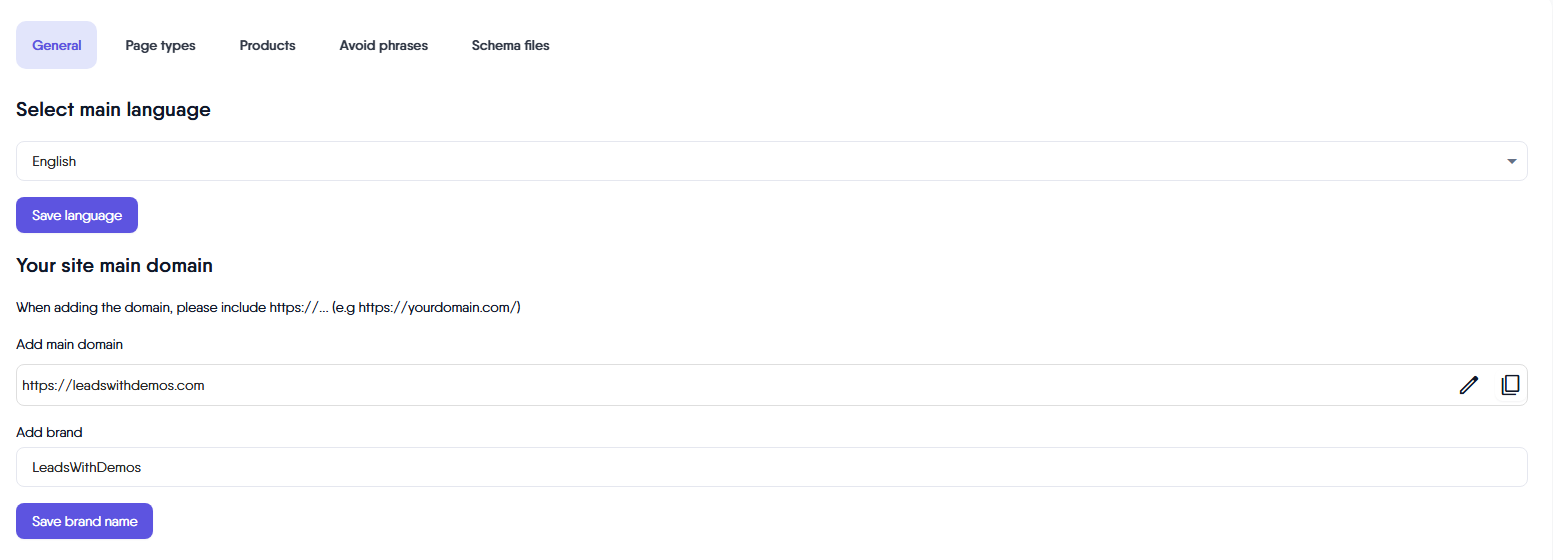
Select main language
This functionality allows you to select the main language in which you want the AI Assistant to generate SEO content. You can also specify the primary language of your website or blog, and indicate that any content you add to the AI Assistant will be in this language. Setting the correct main language is important, as it serves as the foundation for translations and for organizing your content by topics or groups. The available languages in the dropdown list are:
- English
- Spanish
- French
- German
- Portuguese
- Chinese
- Japanese
- Korea
Your site main domain
Add main domain
In this section, you will be able to add your main domain name. This domain name is purely symbolic and is used to provide you with suggestions on how to structure your landing URL paths.
Example: https://your-domain.com
Add brand name
In this section, you can add your brand name. This is especially useful for generating SEO content, such as naming images.
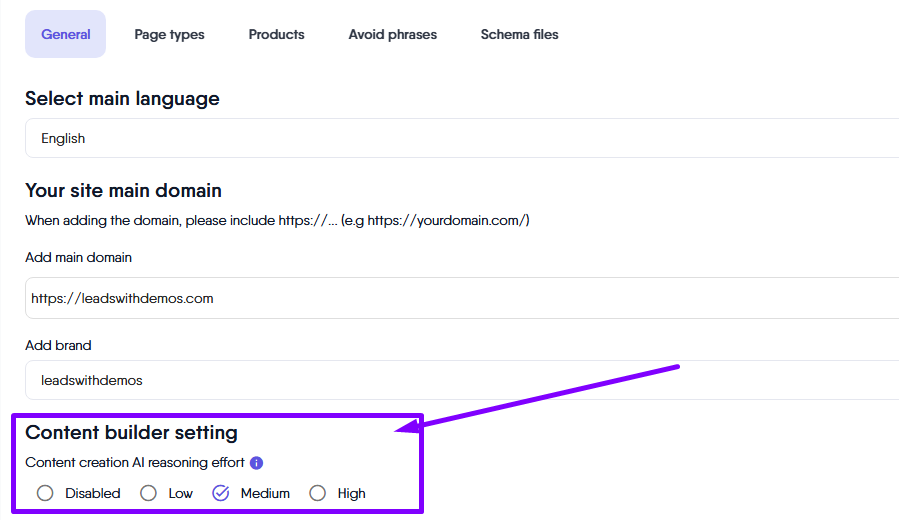
Content builder setting
The Content Builder Setting lets you control the level of AI reasoning effort applied when generating your content, including content from the SEO content builder as well as SEO titles and meta descriptions. You can choose from four options: Disabled, Low, Medium, or High. This setting determines how deeply the AI analyzes and interprets your content requirements.
- Disabled: The AI automatically selects the appropriate reasoning effort.
- Low to High: Sets the AI’s reasoning effort level for content creation.
Selecting a higher reasoning level allows the AI to produce more thoughtful and nuanced content, which is helpful for complex topics or detailed instructions. A lower setting enables faster, more straightforward content generation, which is suitable for simpler needs.
Web search
The Web Search feature in the content creation module allows the AI Assistant to quickly gather up-to-date information from the internet when creating content, especially within the SEO content builder. This is different from the web search tool in the internal chat interface, which is intended for you to find current information for brainstorming purposes.
Page Type Tab
Add new page button
In SEO, the type of meta data content that SEO managers generally create will depend on the type of page. The SEO meta data for a product page is different from that of a blog article. Based on this, this functionality allows you to create different types of pages so the AI Assistant knows exactly how to generate the appropriate SEO meta data.
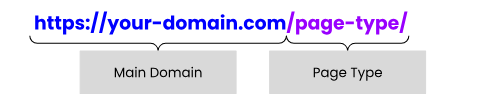
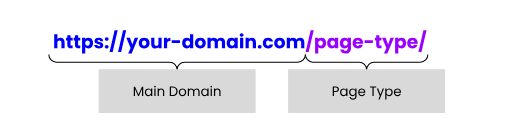
This setting will be used during the SEO AI content creation process as well as for structuring the URL path. This means it will combine the main domain added previously with the path you provide for this type of page.
Example: /page-type/
After clicking on the “Add New Page” button, a popup window will appear with the following options:
Page name
You can add any name as an identifier for the page type. This setting will be used when setting up SEO AI content.
Page topic
In this dropdown list, you can select the page topic or type. Choosing the appropriate page topic helps the AI Assistant generate relevant SEO metadata for each page.
For example, if you are creating recipe articles for your blog, you can select “Blog Article Page” as the Page Topic and give it a custom name such as “Recipes.”
Within the dropdown, you will find the following options:
- Homepage
- About us page
- Service page
- Product page
- Testimonial page
- Contact page
- Blog Article page
- Documentation page
- Case study page
- Press page
- News page
- Terms and conditions page
- Privacy policy page
- FAQ page
- Other page
Page path
The page type will be used as part of the URL structure suggestions. Please add the path you believe this page type should have. For example, if the page type is a homepage, you can simply use “/”; if the page is a blog article, you could use “/blog/”.
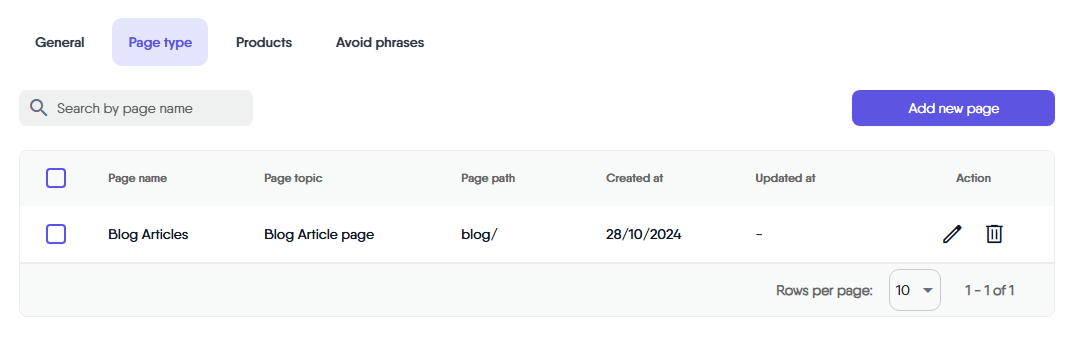
Once the page type is created, it will be displayed in a detailed table.
Page type detailed table
The page type information will be presented in a detailed table, showcasing the page types you have added. Additionally, you will be able to manage each page type. The table includes columns such as:
- Page Name
- Page topic
- Page path
- Created at
- Updated at
- Actions:
- Edit: You will be able to edit the information of the page types to make adjustments.
- Delete: You can delete a page type. When clicking on “Delete,” a warning pop-up will appear to confirm your action.
Products Tab
Add product button
This feature is optional, but from an SEO perspective, it’s recommended to include the product or service you wish to promote as a solution through SEO. This functionality allows you to add multiple products, which can be used when you want the AI Assistant to analyze keywords, understand search intent, and determine how your product or service can address the reader’s needs when those keywords are searched on major search engines.
 After clicking on the “Add Product” button, a popup window will appear with the following options:
Product Name
Enter any name to identify the product. This setting will be used when conducting SEO topic research to see how your product or service can address the searcher’s needs.
Product URL
Specify the URL for the product page. This setting will help identify the landing page of the product on your website.
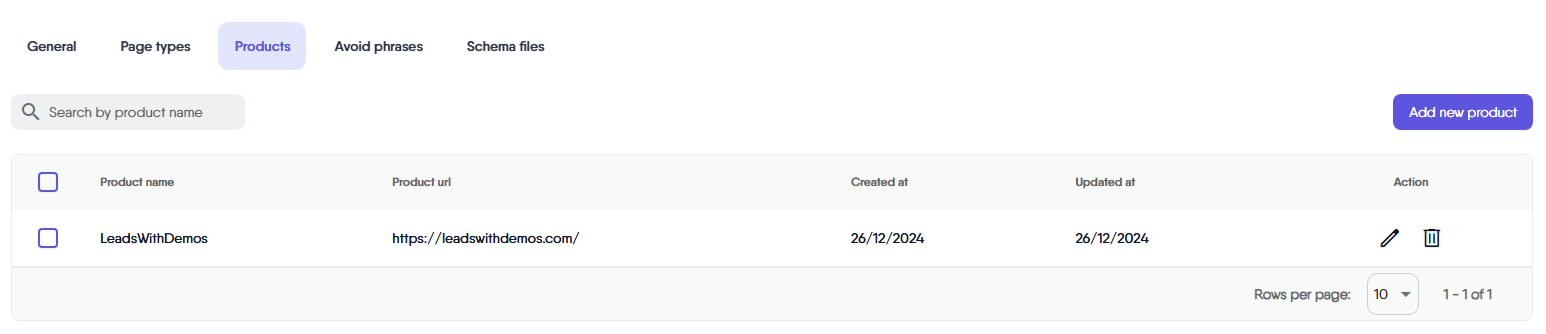
Once you have filled in the required fields, click the Continue button to save the product information. After a product is created, it will be displayed in a detailed table.
Product Detailed Table
The product information will be presented in a detailed table, showcasing the products you have added. Additionally, you will be able to manage each product. The table will include columns such as:
- Product Name
- Product URL
- Created At
- Updated At
- Actions:
- Edit: You will be able to edit the information of the products to make adjustments.
- Delete: You can delete a product. When clicking on “Delete,” a warning pop-up will appear to confirm your action.
Avoid Phrases Tab
Add new word button
When creating content with AI Assistants, it’s likely that the AI will use words you typically do not, or common terms it often employs, such as “Revolutionize”. While you can set the tone of voice in the instructions when creating an AI Assistant in your LeadsWithDemos site, you can also add specific words for the AI to avoid in this section.
After clicking on the “Add New Word” button, a popup window will appear with the following option:
Word
Enter the word you want the AI Assistant to avoid. This will help tailor the content to better match your preferred language and terminology. Once you have entered the word, click the Continue button to save the entry.
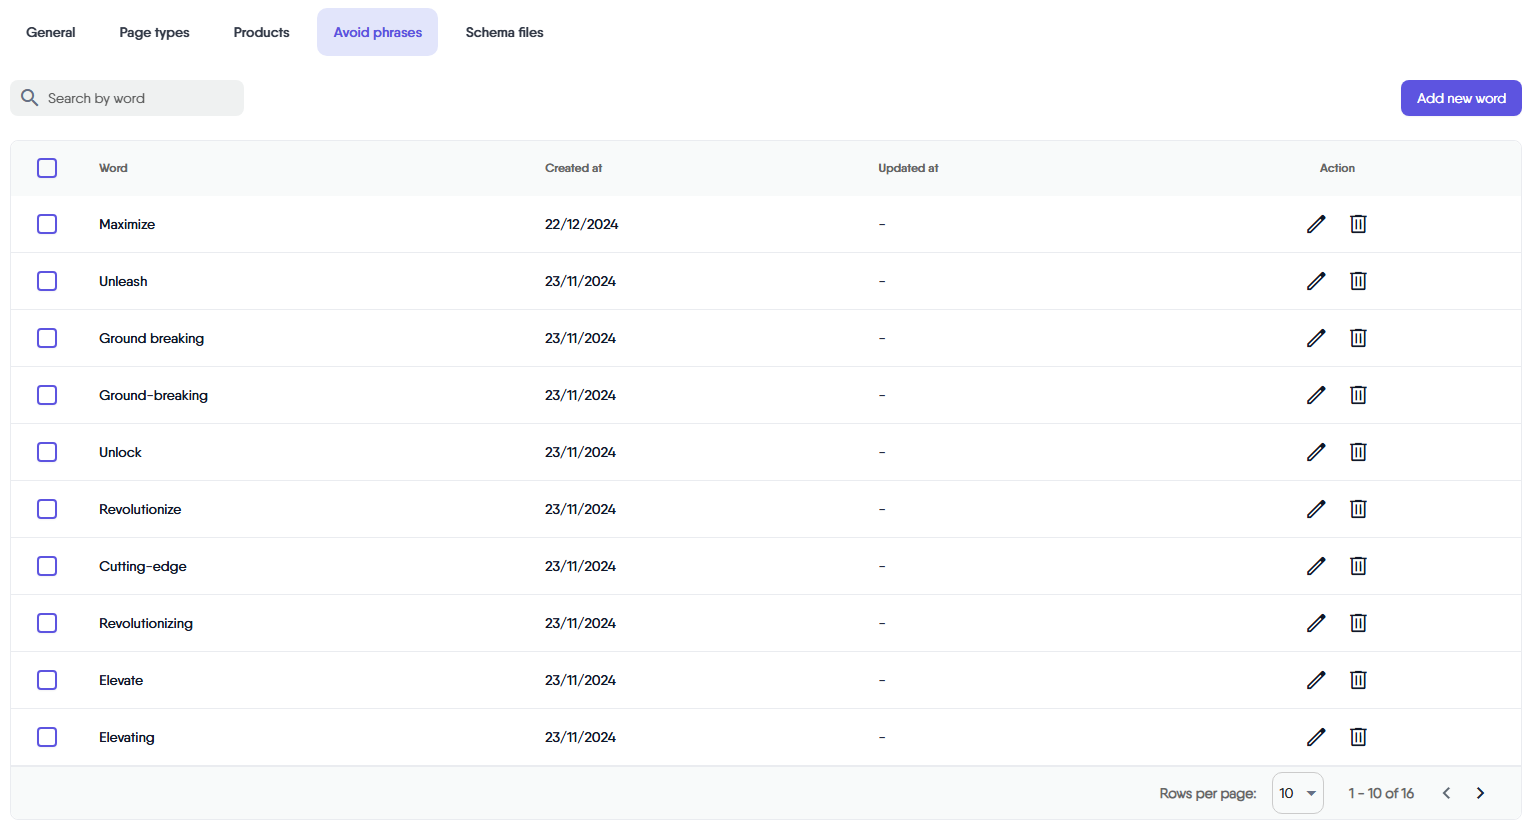
After a word is added, it will be displayed in a detailed table.
Avoided Words Detailed Table
The avoided words will be presented in a detailed table, showcasing the words you have added. Additionally, you will be able to manage each entry. The table will include columns such as:
- Word: The word you want the AI Assistant to avoid when creating content.
- Created At: The date and time the word was added.
- Actions:
- Edit: You can edit the word if you wish to make changes.
- Delete: You can remove a word. When clicking on “Delete,” a warning pop-up will appear to confirm your action.
Schema Files Tab
The Schema Files tab in your AI Assistants is your central hub for organizing, managing, and leveraging all schema files and structured content sources that can be used as custom knowledge source by your AI Assistants. Each schema file serves as a specialized knowledge resource, capturing and indexing the core content, structure, and key relationships from your website or blog such as recipes, product links, affiliate offers, and topical categories.
By building schema files, you can create tailored knowledge bases that enable your AI Assistants to deliver more accurate, relevant, and context-aware responses based on your site’s unique content. This structured approach ensures your assistants can access and retrieve the most valuable information to support your audience and enhance overall engagement.
How it Works
- The tab allows you to organize, review, and categorize schema files that represent your website’s essential content areas, such as articles, categories (e.g., “Breakfast,” “Vegan,” “Healthy”), and special resources.
- The AI Assistant processes the HTML from your site and structures it into schema files (including formats like JSON), providing your AI Assistants with a comprehensive, searchable map of your content.
- These schema files provide the foundation for knowledge retrieval, ensuring that the AI Assistants can deliver accurate, relevant, and up-to-date recommendations and support to readers.
Key Benefits
- Create a Mini Search Engine: Schema files let you index your blog’s most valuable assets, allowing AI Assistants to act as a mini search engine tailored to your site’s topics and key resources.
- Precise Knowledge Organization: Easily categorize content by topic or use case such as recipes, affiliate resources, or product pages, maximizing relevance for both site visitors and AI-powered support.
- Efficient Knowledge Updates: As your site evolves, you can quickly update schema files so your AI Assistants always access the latest, optimized information for content reuse, repurposing, and engagement.
- Stronger Monetization and Engagement: By organizing your structured knowledge into schema files, your AI can surface affiliate links, topical recommendations, and support resources that drive conversions and keep your audience engaged.
The Schema Files tab is essential for building a robust, context-aware knowledge base for your blog or website. It empowers food bloggers, recipe creators, and content strategists to make their AI Assistants smarter, more responsive, and always aligned with the latest site updates and audience needs.
Note: To create this segmentation content and use it as custom knowledge for your AI Assistant, you must first add the content in the SEO AI Response Page and ensure the HTML content is available within each AI Content Detail View Page.
Add new file button
The Add new file button allows you to create a new schema JSON file by capturing the HTML content associated with the main keywords or page URLs previously added on the SEO AI Response page.
When you click this button, a popup window appears with various filter options. These options help you segment your content and define how the schema file will be organized and indexed in your AI Assistants’ custom knowledge.
When creating a new schema file, you’ll be prompted to complete the following fields:
Filename
Enter a unique and descriptive name for your new schema file. This name helps you easily identify and manage your file within the Schema Files table and the AI Assistants’ files. Choose a name that reflects the content or purpose of the file for better organization. For example, use “All Recipes” to create a knowledge base of all your recipes, or “Vegan Recipes in Spanish” if you want to build a knowledge base specifically for your vegan recipes in Spanish.
Language
Select the main language for the schema file from the dropdown menu. This setting allows you to capture content available within the SEO AI Response page in that specific language.
Category
In this dropdown, the system displays categories based on the page topics with their custom names that you previously added in the Page Type tab. When you select a category, the system will retrieve and organize the content you have associated with those specific page types.
Main Keyword
In this dropdown, the system displays all main keywords you have added during the “Set SEO AI Content” process, as well as those available on the “SEO AI Response” page. You can select keywords individually (each main keyword corresponds to and is linked with its respective content), or you can select all keywords by selecting “All”. When you choose a main keyword, the system will retrieve and organize the content associated with that specific keyword for inclusion in your schema file.
Schedule auto update
The Schedule Auto Update feature allows you to set how often a file’s content is automatically refreshed from its original source URL. When enabled, the system will periodically scrape the content from the specified page URL and update the file in your knowledge sources. During each scheduled update, the old version is deleted and replaced with the latest version, ensuring that your AI Assistants always access up-to-date and accurate information.
You can choose from several update frequencies, including Daily, Weekly, Monthly, Custom Days, or Never. Setting an appropriate update interval helps you keep your content current and relevant, without manual intervention.
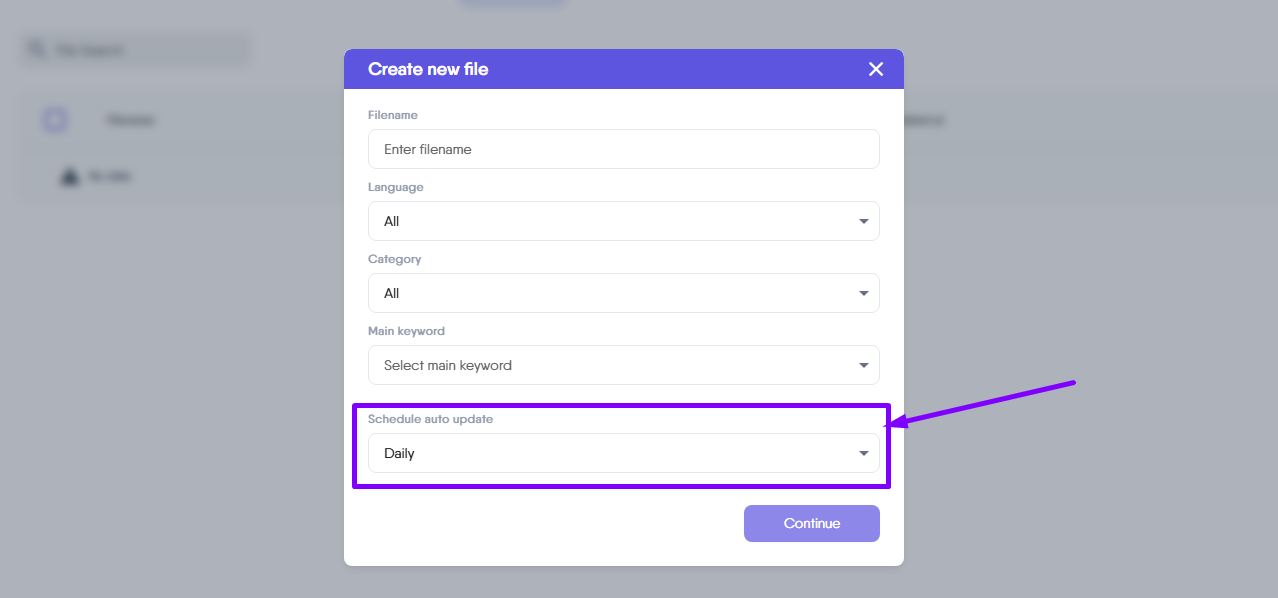
Once you have completed all fields and filter options, click the “Continue” button to create the schema file in JSON format. The newly created file will then appear in the Schema Files table, ready for use as knowledge source.
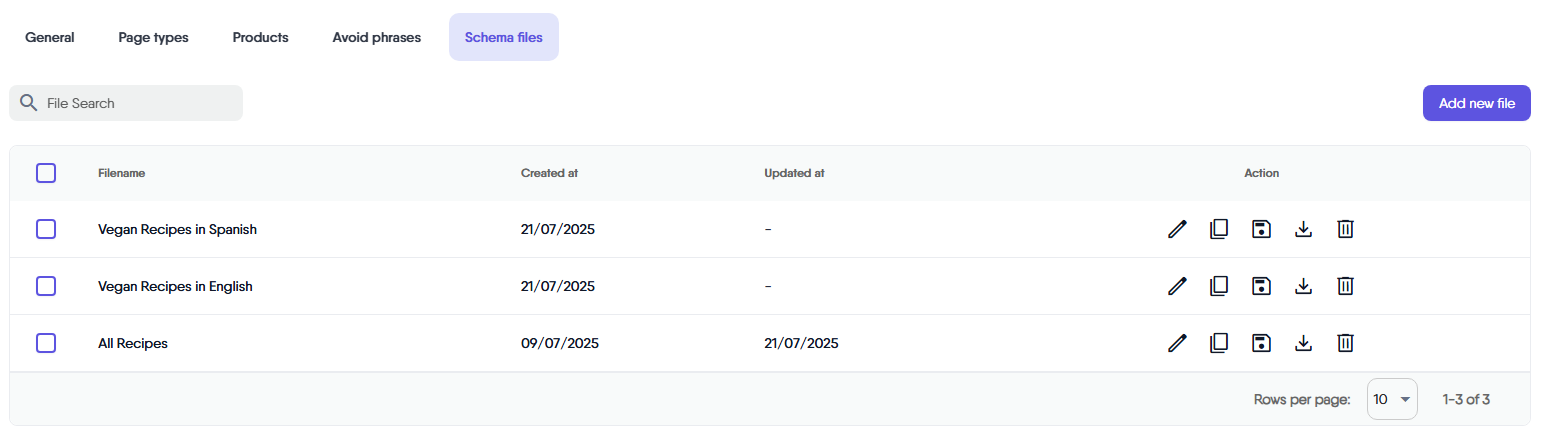
Schema File Detailed Table
All schema files you create are displayed in a detailed table, giving you a clear overview and easy management of your files. The table includes the following columns:
- Filename: The name you assigned to each schema file, making it easy to identify and organize files.
- Created At: The date and time when the schema file was first created.
- Updated At: The date and time of the most recent update to the schema file.
- Actions: A set of management options for each file, including:
- Edit: Edit the file name whenever it’s needed.
- Create a new Copy: Duplicate the file for use as a base for another schema file.
- Save as vector file: Save the schema file as a vector for use within your knowledge sources.
- Download file: Download a local copy of the schema file to your device.
- Delete: Remove the file. When you click “Delete,” a confirmation pop-up will appear to prevent accidental deletion.
Search bar
The File Search functionality in the Schema Files tab allows you to quickly locate specific schema files within the detailed table. Simply enter relevant keywords such as the filename into the search bar, and the table will instantly update to display any matching schema files.