
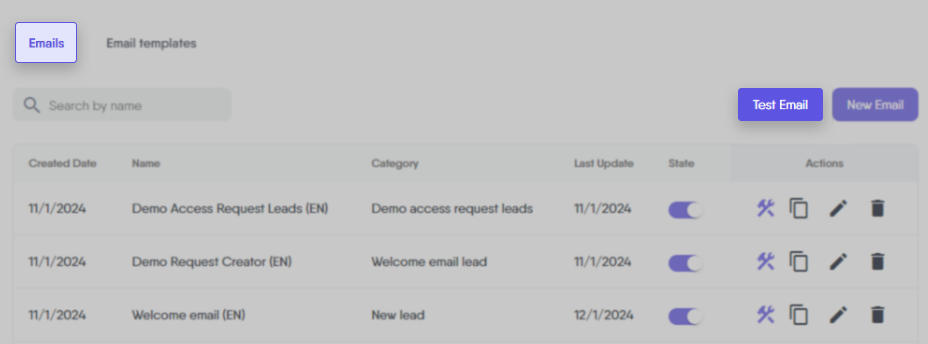
Emails Tab in the Email Builder Section
The Email Tab within the Email Builder section of your LeadsWithDemos site is a crucial feature for creating and customizing your automated emails. It provides a user-friendly interface where you can craft the content of your emails, from the subject line to the body text.
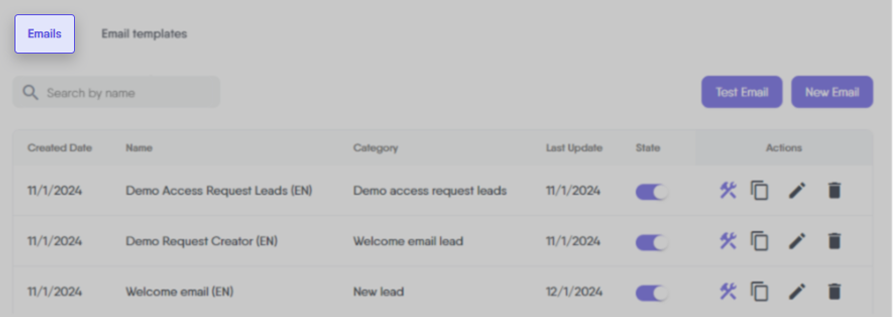
Within the Emails Tab, you will find the following features.
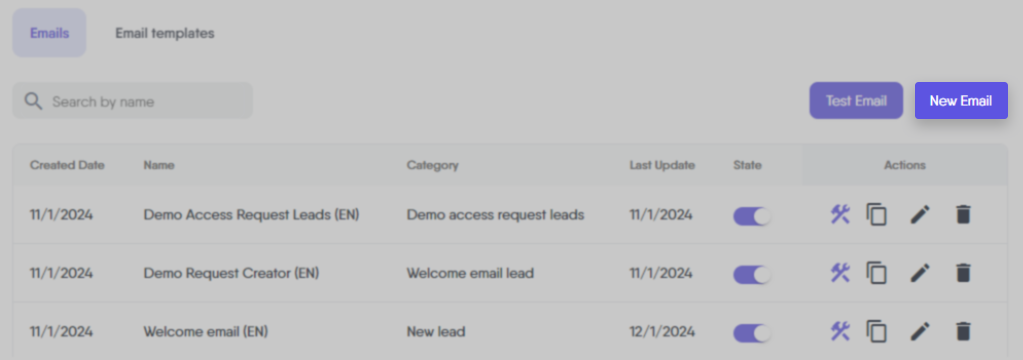
Search bar
The Search Bar in the Emails Tab is a convenient tool for quickly locating specific emails. It’s particularly useful when you have many emails and need to find one based on its name, category, or other attributes. Simply enter a keyword, and the search function will display relevant emails, simplifying the process of managing your automated emails.
Details table
The Details Table in the Emails Tab provides an organized display of important information about your emails, helping you effectively manage them:
Created Date
Shows the date when each email was initially created.
Name
Displays the names of your emails for easy identification.
Category
This indicates the category or trigger for each email. By categorizing emails, it aids in identifying the specific event or action that prompted the email, offering clarity on the email’s purpose and context.
Last Update
Reveals the most recent update date for each email, reflecting the latest changes or modifications.
State
This feature displays the current state of each email, indicating whether it is toggled off (inactive) or toggled on (active). It is crucial to understand that only emails marked as ‘toggled on’ are sent by the system. Therefore, to ensure your automated emails are dispatched as intended, verify that they are set to ‘toggled on’.
Please note that, within each email category—except for the Automated journey emails category—only one email can be toggled on at a time. If you enable a specific email within a category, all other emails in that same category will automatically be toggled off. This setup ensures that only one email per category is sent, maintaining clarity and preventing duplicate messages when multiple emails are present in the same category.
This feature streamlines your communications and ensures subscribers always receive the most relevant and up-to-date email for each specific trigger or category.
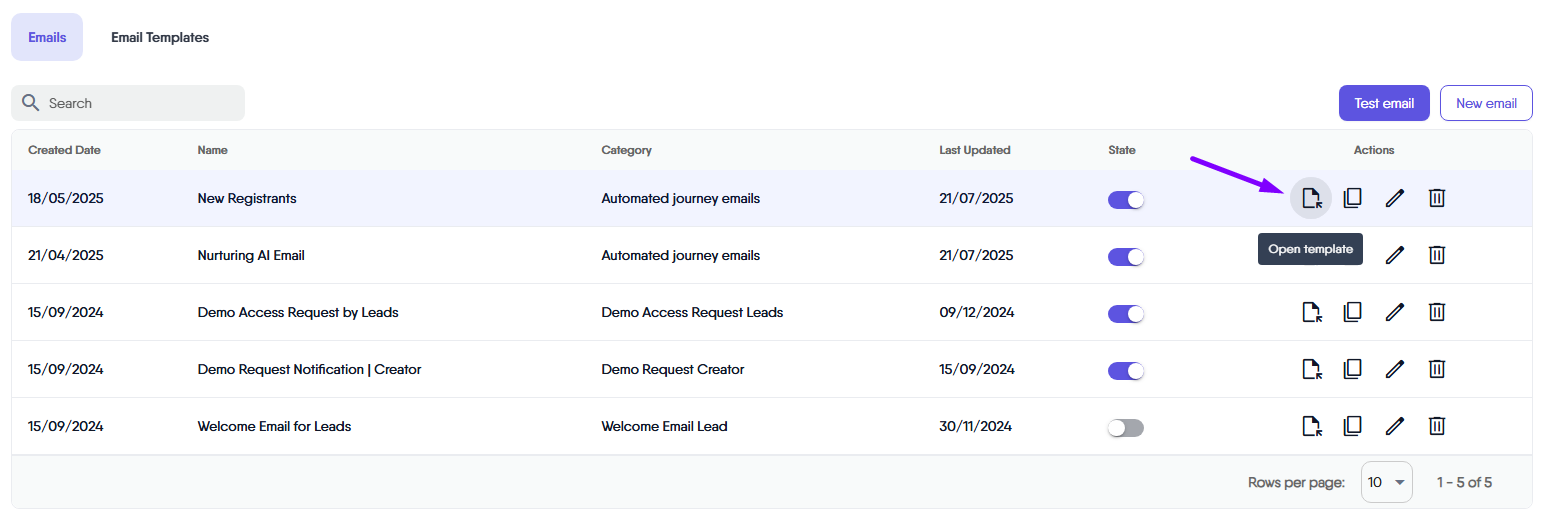
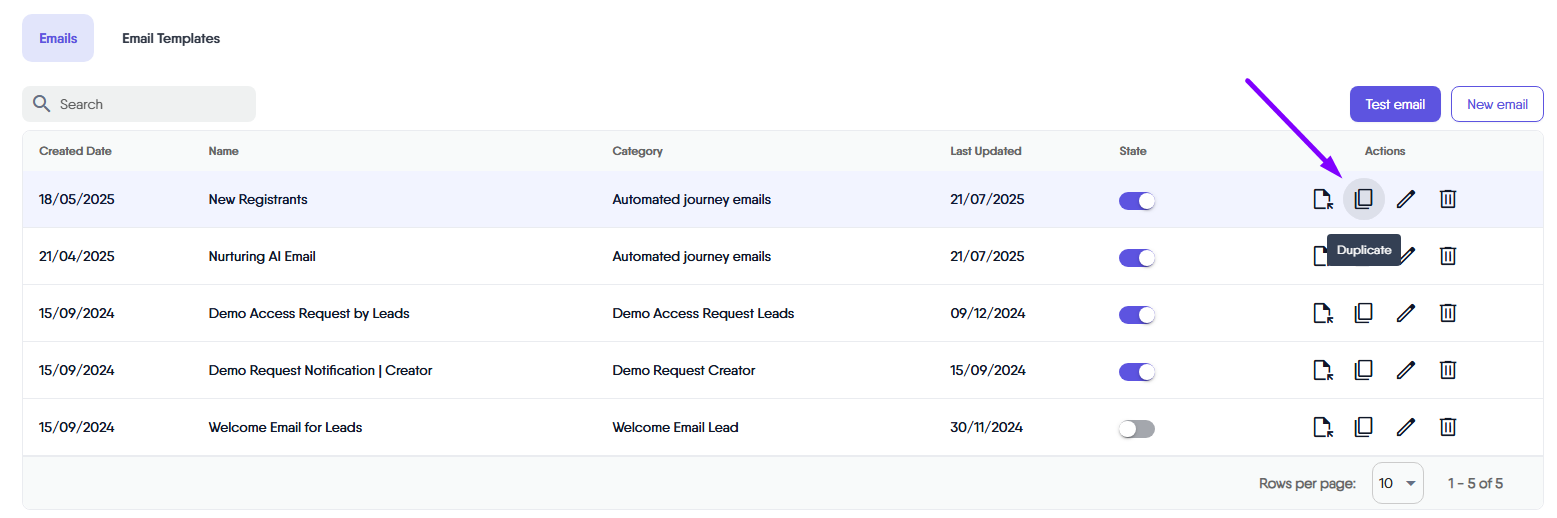
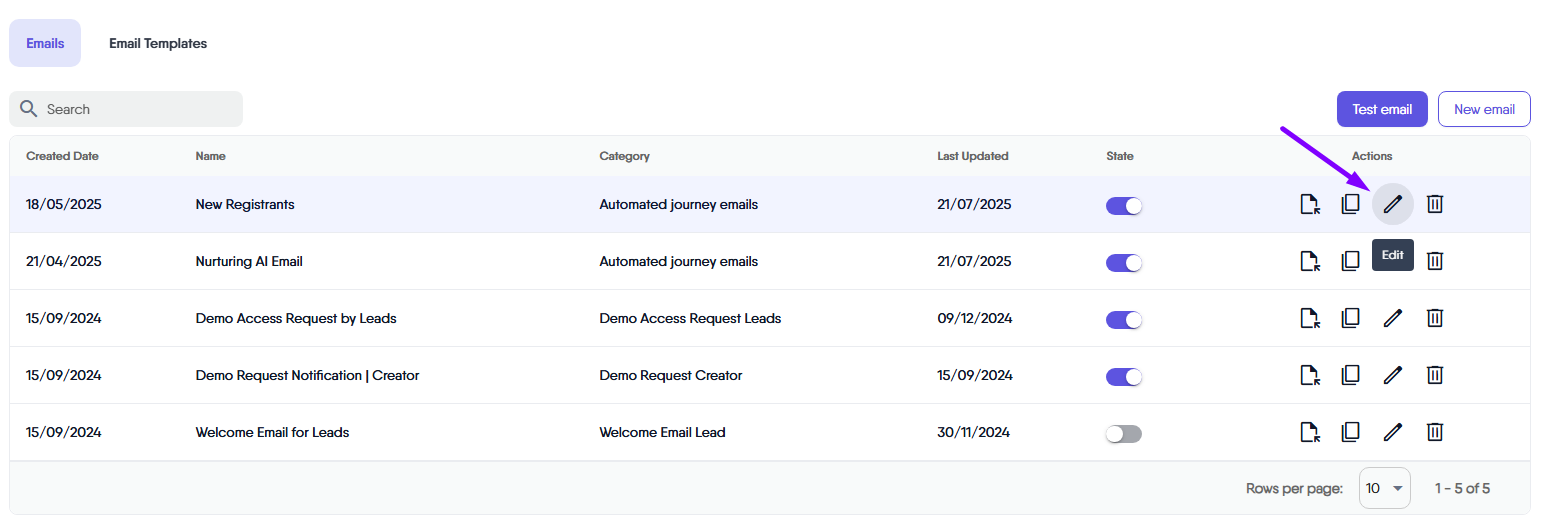
Actions Column
Features several actions for email management:
Open Template
This option allows you to directly edit the email content using our drag-and-drop email builder. It’s a quick way to make adjustments to the email body according to your requirements using the drag-and-drop interface.
Duplicate
Quickly creates a duplicate of the selected email. This is particularly handy for adapting an existing email for different uses or contexts, saving you time and effort.
Edit
Enables you to alter key email details like the name, subject, category, sender and custom reply-to address. Adjacent to the subject field, you’ll find a section listing all available variables. This feature facilitates personalizing the subject line with dynamic content relevant to your subscribers’ information.
Delete
Removes the email from your list, useful for decluttering or removing outdated content.
Test Email
The “Test Email” button in the Emails tab is a valuable tool that enables you to send a test version of your email to a designated test’s email address. This feature is integral for confirming that the content, layout, and overall look of your email match your expectations before it’s sent out to your actual subscribers.
By using the Test Email button, you can fine-tune and ensure that all aspects of the email, including links and formatting, are functioning as intended. This proactive approach is crucial in maintaining the high quality and effectiveness of your email communications.
To use this function, please ensure you have added a testing lead (subscriber) and the specific email you wish to test. These will then appear as options in the dropdown lists.
- Select the desired lead (test subscriber) from the dropdown list to whom you want to send the test email.
- Choose the email you wish to test from another dropdown list, then click send.
These steps are necessary to see the available options for test emails within your LeadsWithDemos site.
New email
Enables you to create a new email template from scratch.
When you click on the ‘New Email’ button, a popup window appears, providing you with options to add essential email details, such as:
Email Name
Assign a unique and recognizable name to your email.
Subject
Here, you can add the email’s subject, and additionally, you can incorporate dynamic variables into the subject line for personalized communication by clicking on the icon to view the available email variables.
If you click on the icon, you will see a list of variables that you can use. Simply copy a variable and add it to the email subject if you wish to do so.
Email Categories or Triggers
Select from a range of predefined categories or triggers available in a dropdown list, tailoring the email’s purpose and context.
Sender
The Sender field lets you specify which email address will appear as the sender for your automated email. You can choose either a default sender email or a specific sender email, depending on your communication needs. In your LeadsWithDemos site, automated emails can be sent from a single (default) sender address, or from various specific sender addresses tailored to each message.
From the dropdown, you can select between two types of sender addresses:
- Default: This option refers to the branded, personalized email address set in your site settings. The default sender is the primary business or domain email address, which can be customized under ‘Site’ > ‘Site Details’ > ‘General Info & Email’ in your LeadsWithDemos site. If you haven’t configured a custom sender, the system uses the standard LeadsWithDemos email by default. Using a branded or domain-based email address builds trust and keeps your communications aligned with your brand.
- Specific: This option allows you to choose any sender email address that you have added and verified in the Senders section of the automated email settings. Choosing a specific sender is useful if you want different types of emails to come from different team accounts (for example, sending updates from info@yourdomain.com and support responses from support@yourdomain.com). Simply select the desired sender for the email you are composing.
Selecting the appropriate sender address for each email helps improve recognition and trust among your recipients, and ensures that your emails are more likely to be delivered and engaged with.
Custom reply-to address
The Custom reply-to address field lets you control where replies to your automated emails are directed. By default, replies from your recipients will go to the sender email address you have selected for the email. However, with this feature, you can specify a different reply-to address if needed.
From the dropdown, you have two options:
- Default: When this is selected, replies will be sent to the same address used in the Sender field. This is typically your business or domain email, or the default LeadsWithDemos sender if no custom address is set up. Using the default keeps things straightforward, especially when there’s only a single team or inbox managing communications.
- Specific: This lets you select or enter an alternate email address where replies should be directed, regardless of the sender address. This is useful when you want responses from recipients to be handled by a particular department or team member—for example, routing support inquiries to a dedicated support inbox, or feedback responses to a specific manager.
Once you have added the email details, click on the “Create Email” button located in the popup window. You will be redirected to the details table, where you will see the newly created email and be able to click on the “Open Template” icon located in the action column. Once clicked, the drag-and-drop email builder interface will open, allowing you to customize your email’s layout and content accordingly. Once the changes have been made, you can simply click on save.