
Campaigns in Your LeadsWithDemos Site
The Email Capture Campaigns feature in your LeadsWithDemos site is a robust solution designed to help you capture emails efficiently. It brings together multiple components to support and streamline your email capture strategy, whether you’re using LeadsWithDemos Popups & Forms or integrating with your email marketing services.
To collect emails on LeadsWithDemos landing pages, simply embed a LeadsWithDemos form. The process for setting up a campaign on a landing page follows the same straightforward steps used for popups and forms, creating a consistent experience across your email capture efforts.
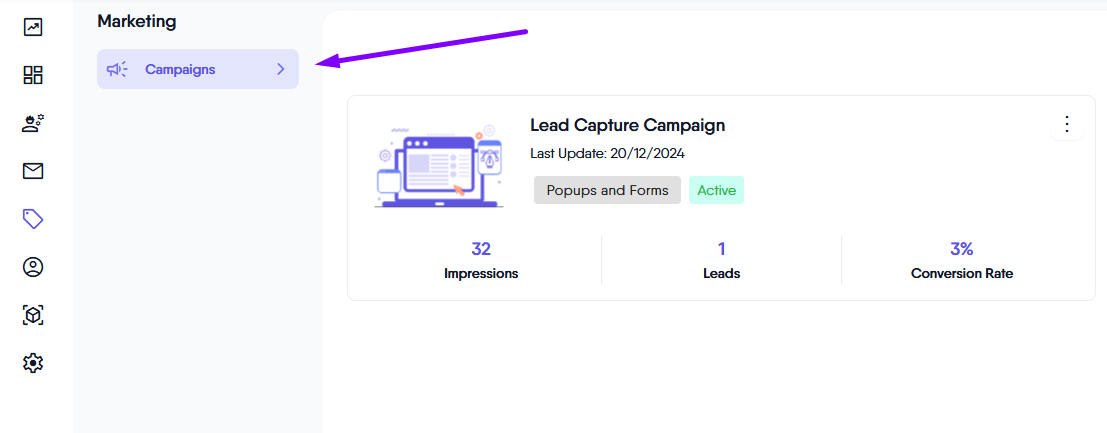
To create a campaign and start collecting emails, navigate to the Campaigns section in your LeadsWithDemos site. Click the “Create New Campaign” button to open a popup window, where you can enter a campaign name, select your lead (subscriber) capture source, and add a campaign description.
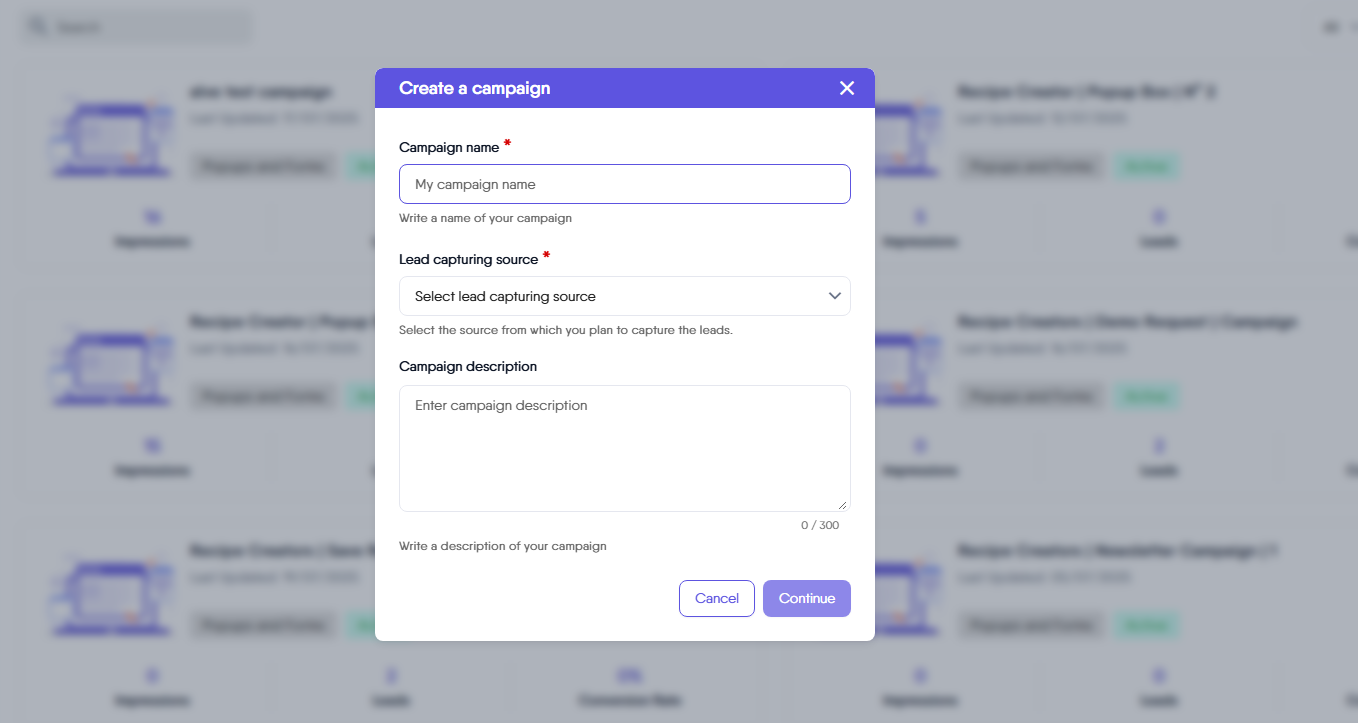
Add Campaign Name
In this field, you can add a descriptive name for your campaign.
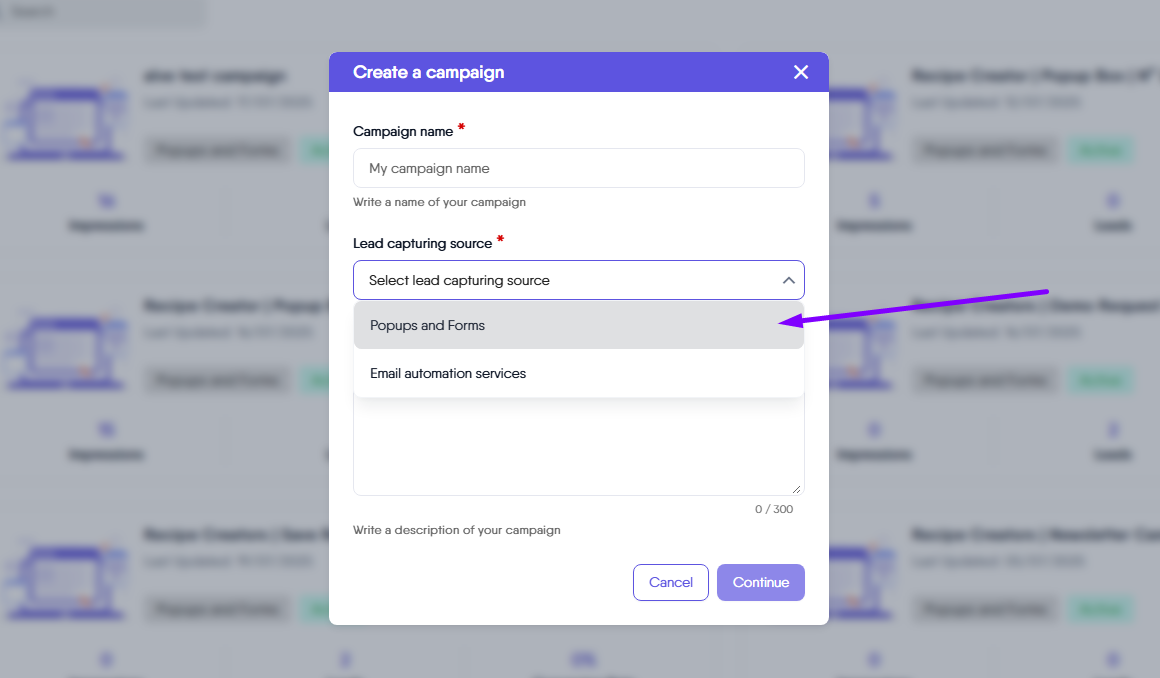
Lead Capturing Source
Currently, LeadsWithDemos supports capturing emails through Popups and Forms, as well as direct integration with selected email marketing services (for internal use only). When setting up your campaign, choose “Popups and Forms” as your Lead Capturing Source to start collecting subscriber emails via the built-in tools.
Campaign Description
Here, you can add a description for the campaign you want to create.
Providing a clear campaign name and description is essential, as this information guides the AI Assistant during the AI Email Writer step to automatically draft relevant and targeted emails. A well-written description helps the AI understand the purpose of your email capture campaign. For best results, include details about the type of content subscribers will receive, your campaign’s goals, or the audience you’re targeting. You can also add links or mention the names of eBooks, guides, or other gated content, which helps the AI generate more personalized and effective email drafts.
