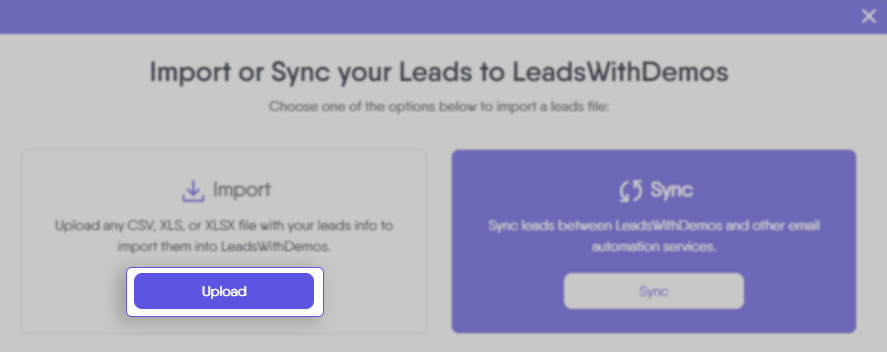
Importing Subscribers via the Upload Method
To upload your subscribers, click on the ‘Upload’ button to select the file from your computer.
Upload
You can upload a CSV, XLS, or XLSX file containing your leads information.
Mapping Fields
Once the file is uploaded, you will be presented with a mapping option. This allows you to match the fields in your file to the corresponding fields in your LeadsWithDemos site.
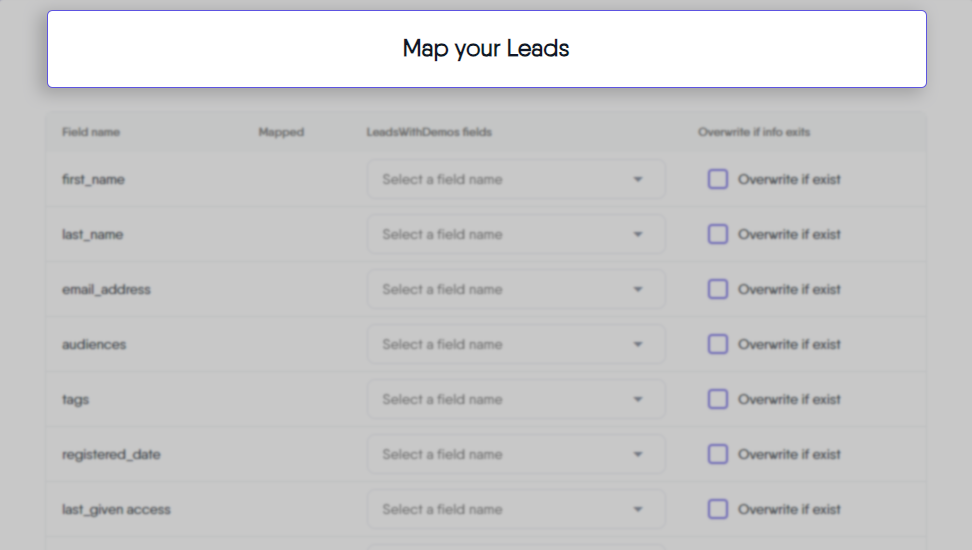
Mapping Table
The mapping table consists of four columns:
Each row in the file represents a unique subscriber, and each column header corresponds to the name of the corresponding field. Each cell within the table contains the associated data for that particular field and subscriber.
Column 1 (Field Name)
Corresponds to the name of the field to be mapped, which is the text displayed in the file’s column header.
Column 2 (Mapped)
Indicates whether or not the field has been successfully mapped to a LeadsWithDemos site field.
Column 3 (LeadsWithDemos Fields)
Lists the existing LeadsWithDemos site fields that you can map to the file’s field name from Column 1.
Column 4 (Overwrite if info exists)
Allows you to overwrite existing subscriber information with the imported data by selecting the ‘Overwrite if info exists’ checkbox. This option is useful for updating outdated or inaccurate subscriber data.
Add a custom field
Enables you to create new custom fields if your file contains fields that are not currently available in your LeadsWithDemos site.
Note: If you need to create custom fields for the imported data, you can do so directly from the “Map Your Leads” window or from Leads > Settings > Custom Fields > Add Custom Fields. Once created, you can select the newly created custom fields from the dropdown list in the LeadsWithDemos Fields column during the mapping process.
Additional information for this process:
Ready to import status
Indicates that you have sufficient subscribers available within your LeadsWithDemos site to accommodate the import. If the number of subscribers in your site is insufficient, you will see the following message: “Increase the number of leads before importing”.
Validating Mapping
Ensure that the fields are correctly mapped by checking for any warnings or error messages on the Mapped column.
Once you’re satisfied with the mapping, click the “Continue” button to initiate the import process. Upon completion, you’ll receive a summary of the import, including the number of new records, updated records, and any potential issues. This summary allows you to review the import results and identify any areas that may require further attention.
Please note that any subscribers you import will be considered subscribed, and will be able to receive marketing automated emails.